- Clothing Patterns 101
- Blouse Styles
- Swing or Flared Top
How to Draft a Swing Top
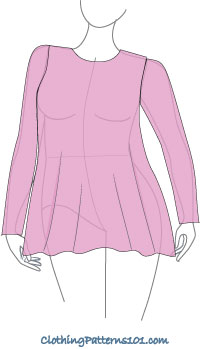
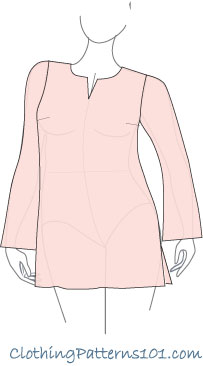
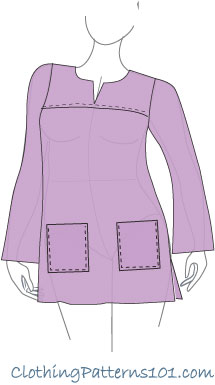
A swing top (or flared top) has an easy fit and comfy style.
It can be hip length or tunic length, with a relatively straight hem or an assymmetrical, handkerchief-style hem.
It's also figure flattering and very popular at the moment!
Before you create these dress, skirt or blouse styles, you'll need a well-fitting dress block. You can create one from a commercial pattern, fitting the block to your measurements and shape.
If you'd prefer to draft a block from your own measurements, Craftsy has courses in Patternmaking Basics: the Bodice Sloper and
Patternmaking Basics: the Skirt Sloper
|
It's so simple to draft, too. It's important to slash and spread your pattern to distribute the fullness, however. If you simply make the hem wider, you might not have the swing you desire, and it may not hang properly. |
I flare the top from the bustline. I find that keeping a natural fit at the bust and shoulders is the most flattering; the fullness is at the hem, not throughout the top. Flaring the top from the shoulder line makes the whole thing big and baggy - not the look I would be going for!
Drafting the Swing Top
Drafting the front of the top couldn't be easier.
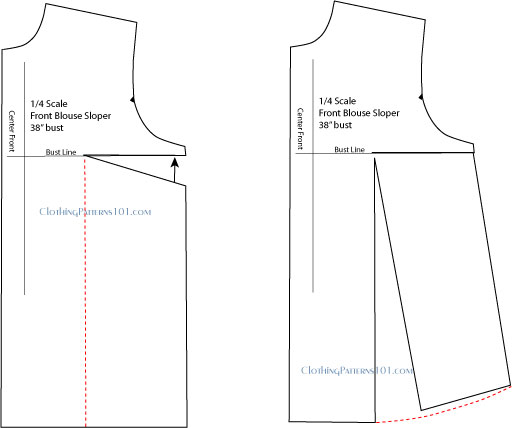
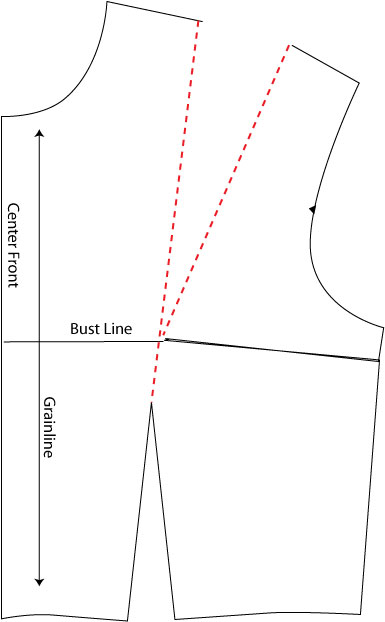
Draw a line from the point of the bust dart to the hem, then cut along that line.
Then just close the bust dart (opening the dart at the hem).
Re-draw the hemline, using a gentle curve from the dart to the side seam.
Drafting the back is only slightly more involved.
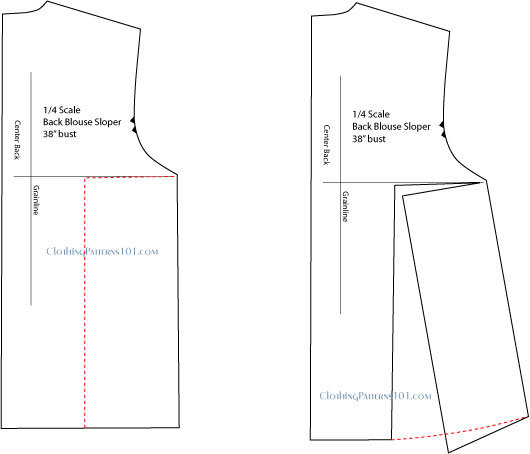
You should have a horizontal grainline just under the armhole on the back of your blouse block. (If you don't, please draw one).
Draw a line from the horizontal grainline to the hem, approximately in the center of the back. Cut along that line, then continue the cut along the horizontal line to the side seam.
Flare the side seam to match the flare on the front pattern. This will force the piece down; don't worry about that.
Re-draw the hemline, again with a gentle curve(which, in this case, will cut off the excess from the side back).
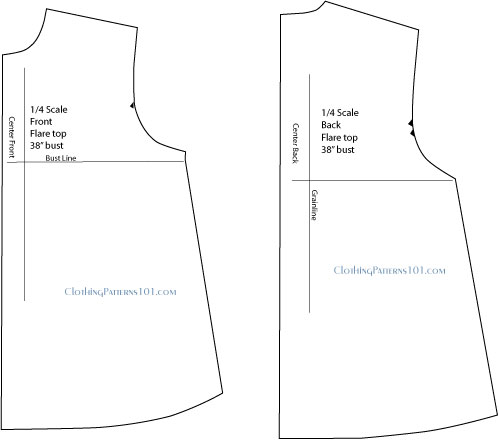
Your final draft should look something like the one at right.
The width of the top will probably not be the same on front and back, but the angle and length of the side seam should match!
You'll be using your basic blouse block for this pattern.
And don't forget to finish your pattern! Add seam allowances, hems, and facings when you're done!
What's the Next Step?
Decide if you want to add sleeves, and what style of sleeve. If you use a blouse sleeve, remember to lower the armhole of the dress, just as you did on the basic blouse. You'll have a bit more room to move, and you can use your blouse sleeve to draft your dress sleeve.
You can also choose a different neckline or add a collar, too.
Then finish your pattern with a hem, seam allowances, and markings, and you're ready to make your new dress or blouse!
More Blouse Body Styles
 |
|
Return to Clothing Patterns 101 Home Page
ClothingPatterns101.com does not sell the personal information of its users to anyone, ever.
