- Clothing Patterns 101
- Using the Fitting Pattern
How to Use Fitting Patterns to Create Your Basic Block
What are “fitting patterns”?
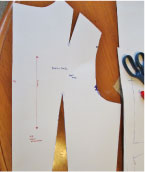
They are very basic – and yes, very boring – dress or pant patterns that you’ll use to achieve your perfect fit before making sewing patterns for your new designs.
Click on the links below to go to the item in Amazon. As an Amazon Associate I earn from qualifying purchases. This helps to keep this site free for your use. You are free to search Amazon for these or other similar items without using the affiliate links on this page.
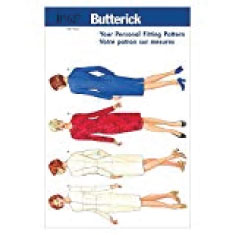
Boring as it is, the commercial dress or pant fitting pattern (which becomes your basic block) is the “blank slate” upon which you will apply your creativity to develop new and distinctive designs.
And they’ll fit every time, because you worked out your fit issues on the boring old dress!
Fit is key to great looking clothes, and for most of us, we make the same sewing alterations over and over again (shortening sleeves, letting out seams, etc).
Once you’ve made those alterations to the basic dress or pant, the corrected pattern becomes the basis for ALL of your designs going forward.
You’ll never shorten sleeves or legs again, because the sleeve or pant leg you start with will be the correct length.
ANY adjustments you make to your fitting pattern will carry over to EVERYTHING you design and make from now on. It’s well worth the effort, don’t you think?
Cutting and Sewing Your Muslin
- Set aside a day – or a weekend – to make and fit your muslin. It’s a bit time consuming, but it is so very important to get this part right – any fit issues that are not corrected now will have to be corrected on every pattern you ever make. The time you spend perfecting your block will pay off time and time again – in fact, every time you design and make a new style. The fit will be right, and the pattern will go together smoothly.
- Buy the dress or pant pattern closest to your pattern size. Use your bust, waist, or hip measurement to determine the correct size - whichever is largest - and FOLLOW THE SIZE CHART on the pattern. The fitting pattern size will most likely be one or two sizes larger than the clothing you buy in a retail store. Don't freak out about it! It's just a number!!!
- You can buy fitting patterns at your local sewing center (look in the very back of the book – most major commercial pattern companies have them) or order one from Amazon.com.
- Cut your fitting pattern from muslin or another light weight, light colored even-weave fabric. You don’t want to use anything stiff or heavy because it won’t fit snugly and smoothly over your body. You also don’t want to use a knit fabric, because the stretch will distort the final pattern. The natural muslin or light color allows you to see your corrections – you WILL be marking on this muslin, so don’t use a “nice” fabric!
- Note the wide seam allowances and all markings on the fitting pattern – these must be transferred to your muslin. Tracing paper and a tracing wheel work well for this, but you can also lay the pattern UNDER the fabric and use a fine-tip marker and a ruler to transfer the markings. The muslin will not be used for anything other than fitting so don’t worry about making permanent markings on the fabric. Mark the grainlines, too so you will be able to see if the garment hangs properly when it’s being fit.
- Sew your muslin together using the marked seam allowances. The wide seam allowances will be uncomfortable at the neck and armholes at first, but we’ll take care of that during the fitting.
- Sew the bodice first, without the sleeves. Keep the bodice open at the center front if you are fitting on yourself (the pattern may indicate a center back opening so you may need to add seam allowance for a front overlap). Keep the opening at the center back if you are fitting on a form.
- Sew the sleeves separately, and the skirt separately (they will be added after the bodice is fit).
- For the pant, leave the center front seam open, about the length of a zipper. It will be much easier to fit the the pant opening in the front.
General Guidelines for Fitting the Muslin
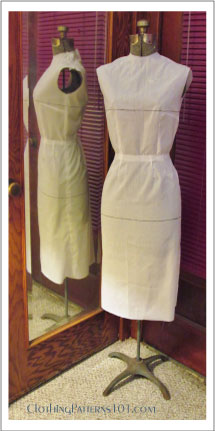
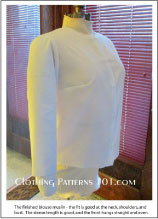
When fitting the muslin, you can use a dress form, fit it on yourself, or have someone else do the fitting on you (or, if you're making this for someone else, you can fit it on them). Start with the bodice, then do the skirt. Even if you're mostly interested in making blouses or tops, the upper part of the skirt helps to fit the lower part of a blouse or top. Set and fit the sleeve after you've made sewing alterations to the bodice.
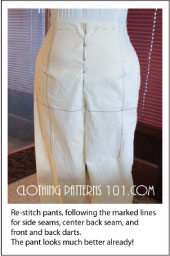
Sew the pant without the waistband. Fit the waist, hip, and crotch areas first and mark the waist so the waistband will sit properly when you set it to the pant.
This dress or pant will be very close fitting, but it shouldn't be tight. There is fit ease built into the pattern; there should be room for movement when worn. If it is too tight or too loose, that indicates an area that needs an adjustment.
Clothing that fits properly, no matter the
style, will allow for ease of movement. Some styles, of course, are
designed to have more ease (this is "style ease" as opposed to fitting
ease).
Garment ease refers to the amount of extra room there is between the garment and the body. There are 2 types of garment ease: fit ease (the amount of room you need to feel comfortable and move easily in the garment) and style ease (adding additional fullness for style purposes, such as a full skirt).
Oversized garments, surprisingly, aren't always more comfortable
or easier to move in. When the garment is very oversized, the
excess fabric often gets in the way (something to bear in mind when you
design your own fashions). The fitting pattern (this dress or pant) should have
enough ease for movement, but it's should not hang loosely anywhere.
Tie a string or a piece of 1/4" elastic around the waist. This should be somewhat snug, but not tight or binding. This makes it easier to see if the waist seam (bottom the bodice/top of the skirt) is straight and even. Again, if the line isn't parallel to the floor, you'll probably have to adjust the length at the waist (we'll get into specific fit issues in the next pages).
You're ready to start fitting and making sewing alterations to the pattern!
What's the Next Step?
Need More Help with Fitting Issues?
The examples on this site reflect MY fitting issues and how I resolved them. Your body is likely very different.
But, since this is a site about the mechanics of making patterns and not specifically about fitting, I'm not going to address other fit issues here. And believe me, there are others who can address this issue better than me.
Any of the books listed below will help you achieve good fit. You can use the techniques on any pattern; but why make the same corrections over an over again? Apply the principles to your block, and the fit corrections YOU need will be automatically built in to every pattern you make!
I can recommend any of the following books and an online courses to help you achieve good fit, no matter what your size or shape. I own or have used almost all of the books on this list, and have been pleased with how they address fit problems.
And there are a couple that address plus sizes, too!
Click on the links below to go to the item in Amazon. As an Amazon Associate I earn from qualifying purchases. This helps to keep this site free for your use. You are free to search Amazon for these or other similar items without using the affiliate links on this page.
I am also an affiliate of Craftsy, and receive a small commission on their classes. I have taken several Craftsy classes, and highly recommend them. Click on the text links, below, to find the classes at the Craftsy site. You may need to become a member to access the classes.
- Pattern Fitting With Confidence - A very useful book written by the late Nancy Zieman, host of the TV series "Sewing with Nancy". She provides a straightforward, down-to-earth approach to sewing and fitting. Very user-friendly.
- The Complete Photo Guide to Perfect Fitting - I love this book!!! So wonderfully illustrated with photos, using commercial patterns to demonstrate the pattern alterations. It addresses almost any fit problem you might have. So easy to understand and follow!
-Sewing for Plus Sizes - Creating Clothes that Fit and Flatter - A great book for Plus sizes! As a woman gets larger, it's not just the measurements that change - our overall proportions shift, too. This book addresses the different body types and proportions you commonly see in larger women. Truly helpful for larger women.
- Fitting Solo from Measurements to Muslin - This class shows you how to take your own measuements (fundamental to creating your block), and then make adjustments to the pattern (make these changes to the FITTING pattern for a perfectly fitted block!). You will also make a muslin, as I have described in the block-making process. It's kind of like the instructions on this site, but with video demonstrations!- Pattern Alterations: Fixing Fit Issues - This course covers pattern alterations to correct a gaping neckline, sleeve issues (including fitting the bicep), and making adjustments to the abdomen and seat areas.
- Plus Size Pattern Fitting and Design - As a size 16 (and only 5'2" tall), I qualify as a Plus size. And I've taken this class with Barbara Deckert - it is FABULOUS! Aside from the fitting tips, she also explains the style lines and silhouettes that are flattering to the Plus size figure. I highly recommend this class!

