- Clothing Patterns 101
- Padding the Body Form
Padding The Body Form to Match YOUR Figure
A body or dress form is invaluable in getting the best fit for the clothes you design and make.
Unfortunately, body forms that you buy don't really replicate YOUR body. These forms are made according to average body measurements and proportions. But average means it's a compilation of a wide variety of sizes and shapes, and it doesn't accurately reflect the size and shape of any one individual (for example, YOU).
So, what do you do? You add padding to your dress form to make it look like your body!
Start with a Purchased Form and Shaped Foam Pads
I am NOT built with the "standard" proportions of a misses figure (which, typically, has a difference of about 10" between the waist and bust/hip measurements). I'm very much an "apple" shape, with a thick waist and belly. There's a difference of about 5" between my waist and hip/bust, so my body form needs as much padding in the middle as I have on my body!
Fabulous Fit has a set of shaped foam pads that are placed under a knit cover and can be moved and arranged to create whatever shape you need. It's a bit pricey (about $75 - $100), but well worth it. The set includes more than a dozen pads, and since they're held in place under the stretchy cover, you can add, remove, or move them as much or as often as needed. It's great if you're losing weight or sew for others. Other methods, as outlined below, are permanent; you'd have to take the whole thing apart and start over if there's a big change in your size or shape.
Although the padding system was developed to be used with Fabulous Fit's own body forms (which are, by the way, truly fabulous!), you can order the pads separately and use them on any form, as I demonstrate here:

If you're serious about making clothing that fits, these pads are truly your best option.
They are designed and shaped specifically for this purpose, and they really do give you a realistic, HUMAN shape. The store-bought forms, on their own, are just too flat and hard, and adding batting or flat foam pieces can be difficult to shape correctly.
Customizing Your Body Form with Plastic Bags and Batting
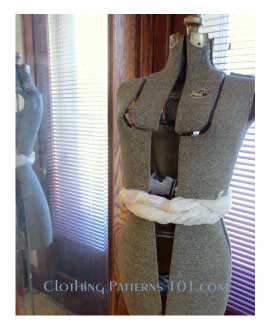
My body, as I've mentioned and you'll see during this process, is very much an "apple" shape - I'm big through the middle but I don't have much in the hip area. From the front, I'm relatively straight, but I have a bust, a belly and a booty, so from the side I'm an "S" shape.
I started with an inexpensive form I bought at a garage sale. It's old and a bit rusty (but so am I!) - but it serves the purpose.
I opened it up as much as possible in the middle and the bust, but not the bottom.
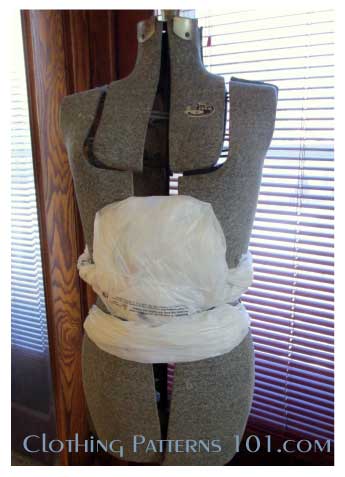
Then I wrapped the waist with plastic grocery bags to fill in the gap between the top and bottom of the form.
I then added more plastic grocery bags to the belly area.
I pinned these bags in place. Everything will eventually be hidden by a fabric cover, so you don't need to be very neat at this point.
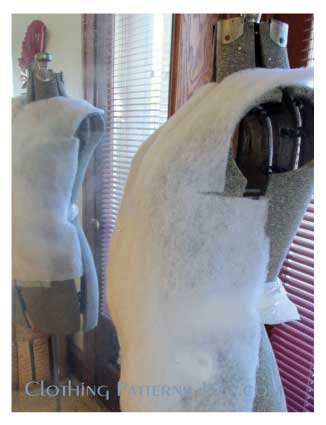
Next, cover with batting. I had 1/2" batting, but you can use whatever you have. This layer adds bulk if you need it (to increase the overall size), or you can use a thinner layer just to smooth over the bags. I also cut a "V" shaped notch into the batting to go over the bust smoothly (think of a dart - the "V" shape is like a dart, and you pin it closed over the shape of the bust).
It's beginning to look like a blob of batting, but don't worry - we'll get some shape definition in the next step.
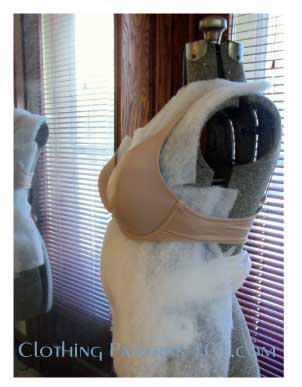
At this point, I use an old bra to help define the shape of the bust and ensure that it is as close as possible to the shape of MY bust.
Using a bra that fits you well will give you the best duplication of your own bust, because a bra that fits you well will give you the right size and shape of the breasts. This is critical to good fit in tops and dresses.
Use an old bra, though. This will be incorporated into the body form and you won't be wearing it any more!
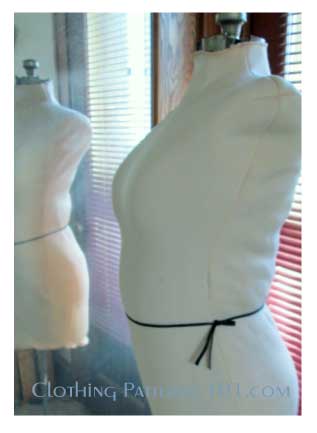
To cover the form, choose a knit fabric. I used a fleece that has a smooth side and a pile side.
I pinned the fabric together, inside out, right on the form. Then I took it off the form and sewed up the sides. I didn't worry about making it pretty; I just wanted to cover and smooth the batting.
I then tied a string around the waist to identify that feature (since, in my case, it's kind of hard to find the waist!)
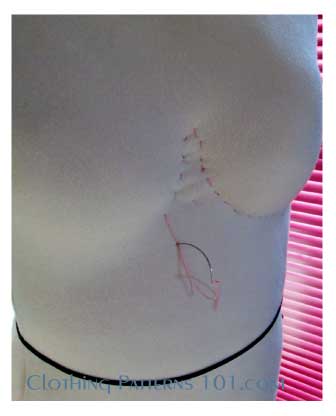
The fleece cover smoothed the body a bit too much. Too give the bust a bit more definition, I stitched through the fleece to the base of the bra.
A curved needle, like one you'd use for upholstery, is helpful for this task.
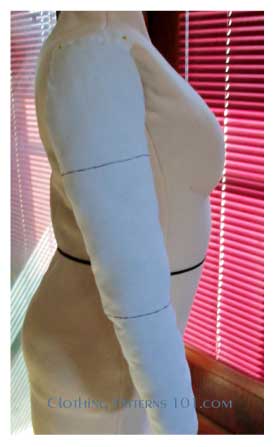
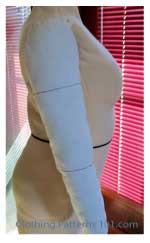
This is a side view of my finished form, with a padded arm attached.
As I said, I have a bust, a belly and a booty, so from the side I have an "S" shape. It's not pretty, but it's me.
The padded arm is easy to make. Using the sleeve pattern from your fitting pattern, cut a muslin sleeve that is a size smaller than your size (or just cut your size and stitch it with a 1" seam allowance instead of 5/8").
Sew a circle of fabric at the wrist end to hold your fiberfill. Then stuff the arm (not a lot - just enough to give the arm shape). Hand-sew another circle of fabric to close the top, and attach another strip of fabric along the top of the sleeve cap so you can pin it to the form at the shoulder.
You can also mark the placement of your wrist so that your sleeves are always the right length.
And you're done! You now have a body form that replicates YOUR body (or at least, it comes a lot closer than any purchased form can). This will make fitting your garments SO much easier and more accurate.
Or.....Use Duct Tape!
Finally, you can duplicate your body shape by wrapping yourself in duct tape and then cutting it off your body. Really! You just need duct tape, an old tee shirt - and a friend willing to help.
Here's a video that shows you how (not my video):

What's the Next Step?
Return to Clothing Patterns 101 Home Page
ClothingPatterns101.com does not sell the personal information of its users to anyone, ever.


