- Clothing Patterns 101
- Basic Pattern Techniques
- Drafting Princess Seams
How to Draft Princess Seams for Flattering Fit
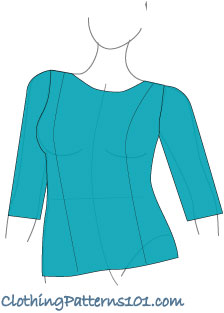
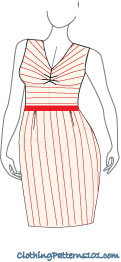
Use these style lines to add color-blocking to a dress or top (make the sides black and the center white or a bright color) - it's a modern, sophisticated take on a conventional sheath.
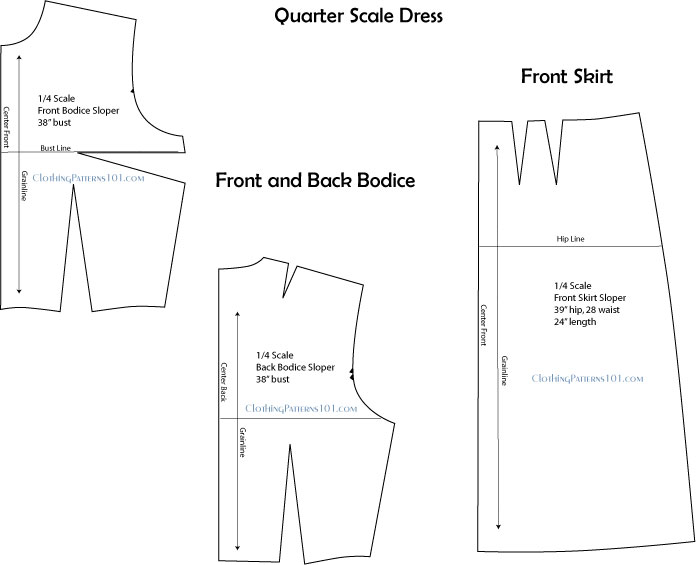
Please note: The following directions assume you will be using your personal block to create a full-size pattern. If you are practicing pattern drafting techniques or are experimenting with pattern design, I strongly recommend you print and use our quarter scale patterns.
Waist and bust darts can look cluttered on a top or dress, and they often look out of date (depending on the style you're looking for).
You can achieve a nicely fitted top or dress without the use of traditional waist and bust darts by converting those darts into a shaped princess seam.
The technique is quite easy; you really just move the placement of the darts and then re-shape the seam a bit - it takes almost no time at all!
You'll start with your basic fitted bodice block and trace it onto paper.
You can use newsprint at this point, because you will be cutting and taping this copy, and then it will be thrown away when you trace your final copy.
DO NOT CUT YOUR ORIGINAL BODICE BLOCK! Trace it onto an inexpensive paper for cutting.
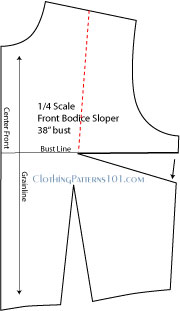
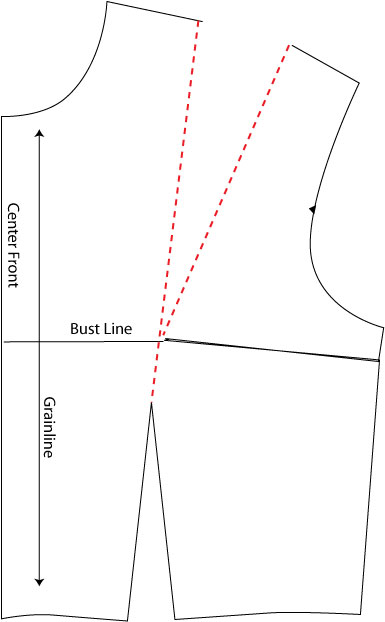
Draw a line from the center of the shoulder to the apex of the bust (the point of the bust dart).
Cut along the drawn line, then close the side bust dart and tape it closed.
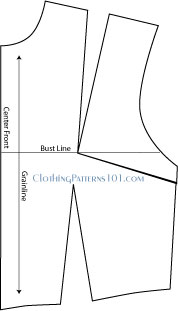
This will open the shoulder and create a new dart from the shoulder to the bust. THIS IS CALLED PIVOTING THE DART. It's a simple way to change the position of a dart while maintaining the correct shape and fit over the bust.
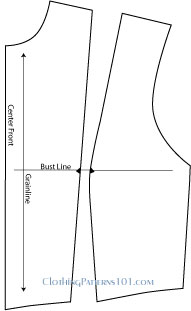
At this point, you can draw another line between the points of the shoulder and waist dart and cut them apart (as shown below).
Trace the pieces onto your brown craft paper, freezer paper, or whatever you use for your final pattern. Do NOT use newsprint at this point, as it can stain your fabric. Once you've traced onto your final pattern paper, you can toss the newspaper version.
Once you have separated the center and side front along the dart lines, smooth the lines as needed (the side front, in particular, may have points where the line was cut - smooth those points into a nice graceful line).
REMEMBER: Your bodice block does not have seam allowances or hems. Add your seam allowances, hems, grainlines and marks to your final pattern.
Place marks at the apex of the bust to guide you when sewing these curves together.
You've made a princess seam!!
Now, you will most likely combine this technique with others to create your final style. For example, to create the top, above, this bodice would be lengthened, using the skirt bodice as a guide to shape the side and ensure fit through the upper hip. (see Making the Blouse Block for how to lenghten the bodice into a blouse or top)
The princess seam can be used for tops and dresses - just combine the bodice and skirt patterns into a dress before drawing the princess line.
And remember: YOUR BLOCK DOES NOT HAVE SEAM OR HEM ALLOWANCES. Once you've patterned your top or dress, add seam allowances, a hem, and markings (grainlines, matching points, etc).
