- Clothing Patterns 101
- Blouse Styles
- Fitted Shirt or Blouse
How to Draft a Fitted Shirt or Blouse
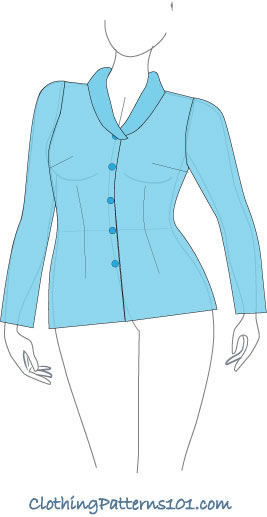
A fitted shirt or blouse is a classic addition to your wardrobe, and it's relatively easy to draft from your bodice and skirt block.
Unlike the basic blouse, which has a more relaxed fit and will have some fullness above the waist when tucked into a waistband, the close fitting blouse will lay smoothly when tucked in.
Or, you can wear the shirt untucked, and it won't look boxy or frumpy.
Before you create these dress, skirt or blouse styles, you'll need a well-fitting dress block. You can create one from a commercial pattern, fitting the block to your measurements and shape.
If you'd prefer to draft a block from your own measurements, Craftsy has courses in Patternmaking Basics: the Bodice Sloper and
Patternmaking Basics: the Skirt Sloper
|
How closely it fits is a matter of taste and style; you can make your blouse very body conscious, or nip it in just a bit for shape. The shaped waistline looks great with almost any kind of collar or sleeve you choose. It's especially nice when worn under a suit jacket, as it fits smoothly without adding bulk. |
How to Draft the Fitted Shirt Body
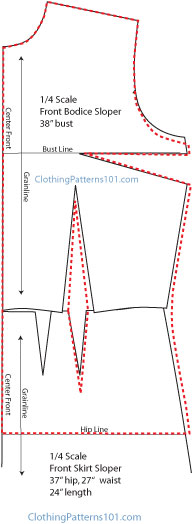
Like the basic blouse, start by laying the front bodice over the front skirt block pattern. The waist darts may not line up (the skirt often has 2, where the bodice has only one) - but don't worry about that.
Trace around the front, neck, and shoulder, following the block pattern.
Start tracing the armhole, but lower the curve at the bottom of the armhole by 1/2" and extend the armhole outward by 1/4" (this allows more freedom of movement in the blouse than in the basic bodice).
Trace the bust dart, then follow the sides, curving in at the waist, to the hip line (adding the extra 1/4" all along the side seam). The hip line is the bottom of the blouse.
Make a waist dart by following the waist dart of the bodice, but do NOT make the dart quite as wide at the waist as the dart in the bodice block. Although this blouse is fitted, it is not as closely fitted as the bodice block.
Continue the dart into the lower portion of the blouse. Use the skirt darts as a guide as to the depth of the dart. It is not necessary to follow the skirt darts precisely, as they may not exactly match the bodice dart. The bodice dart is more important in this case than the skirt dart (for placement).
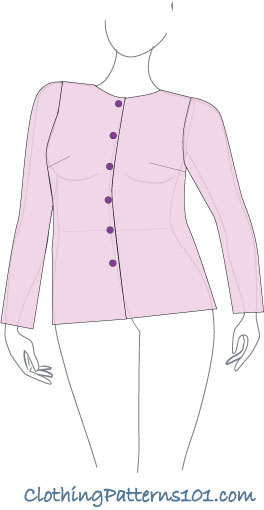
Note: the sketch shows a very closely fitted version of the blouse body; you can make it less fitted by making the side seam less curved, and the waist dart narrower. The degree to which you "nip in" the waist is entirely up to you, and how you choose to wear each blouse.
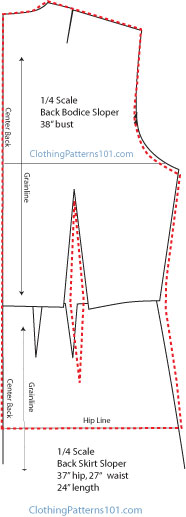
Drafting the back shirt pattern is very similar to drafting the front.
Before you start, you can close the back shoulder dart; this will force the waist dart to be wider, but it won't affect the fit of the shirt.
Trace the front, neck, and shoulder as you did the front; lower the armhole 1/2", too.
Draw the side seam exactly the same as the side seam on the front pattern (if you have already cut out your front pattern piece, use that as a guide). It is critically important that the front and back side seams match or the blouse won't hang properly.
Use the hip line as the bottom of the blouse.
Draw the waist dart the same way you did the front waist dart; the back dart generally is much more narrow than the front dart.
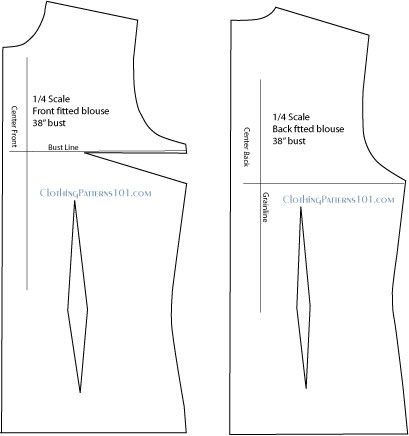
Your final pattern will look very similar to the sketch at right.
The bust dart remains for good fit. If you prefer, you could close that dart and widen the waist dart (do this before you trace the side seams, etc.).
Follow the instructions on the basic blouse page for drafting the sleeve; the process is the same for the easy-fit blouse and the fitted shirt.
This page shows you how to create a blouse using your basic bodice and skirt blocks.
And don't forget to finish your blouse with facings, hems, and seam allowances!
What's the Next Step?
Decide if you want to add sleeves, and what style of sleeve. If you use a blouse sleeve, remember to lower the armhole of the dress, just as you did on the basic blouse. You'll have a bit more room to move, and you can use your blouse sleeve to draft your dress sleeve.
You can also choose a different neckline or add a collar, too.
Then finish your pattern with a hem, seam allowances, and markings, and you're ready to make your new dress or blouse!
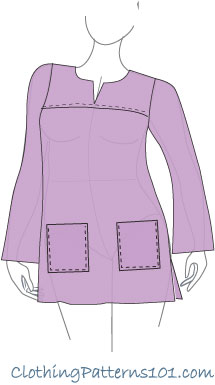
More Blouse Body Styles
 |
|
Return to Clothing Patterns 101 Home Page
ClothingPatterns101.com does not sell the personal information of its users to anyone, ever.
