- Clothing Patterns 101
- Skirts and Dresses
- Circle Skirts and Handkerchief Hems
Circle Skirts and Handkerchief Hems
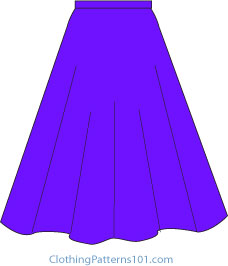
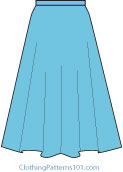
A circle skirt is, as the name implies, simply a circle with a hole in the center for the waist.
Well, it's a bit more than that, but not much! I do have to warn you, though: THERE WILL BE MATH INVOLVED.
We'll be drafting a full circle skirt, but you can also make your skirt with a 1/2 or a 3/4 circle if you don't want it quite as full. The waist measurement must remain the same, regardless of the fullness of the skirt, so that makes the math a bit more complicated, unfortunately.
You could use your skirt block and slash and spread the pattern, but I'd like to show the calculations for the skirt so you have the option of doing it another way.
You can make this skirt from a soft fabric for a very full, fluid look, or use a firmer fabric (and a petticoat) for a really full, "poodle skirt" look.
Drafting the Circle Skirt
While this is a full circle, this skirt will have 2 side seams, or 4 seams (center front, center back, and sides) and a side or back zipper. In adult sizes, it's very difficult to find a fabric wide enough to cut the entire circle without seams.
You'll need to know your waist measurement, and how long you want the skirt to be.
My example is for someone with a 27" waist, and the skirt will be 28" long.
HERE COMES THE MATH:
Remember that PI = 3.14". The circumference of a circle is PI x the diameter.
In this case, you already know the circumference of the waist circle; it's the waist measurement, 27"
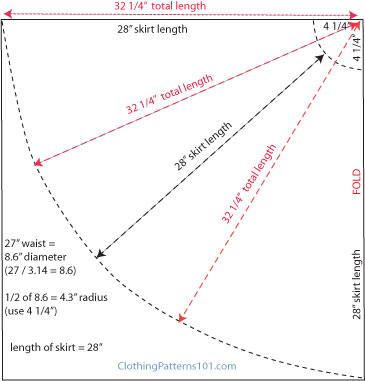
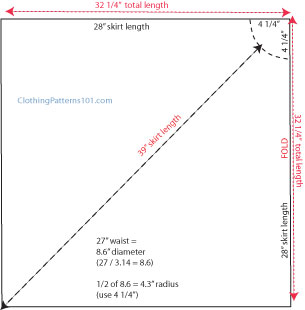
Divide the waist (27) by PI (3.14) = 8.6". This is the diameter of the waist circle.
Divide that in half again to get the radius of the waist circle. 8.6 divided by 2 = 4.3. (use 4 1/4")
Use a piece of paper that is about 36" square (36" in both length and width).
From the corner, draw points at 4 1/4" along the top and side of the paper (the radius of the waist circle), and in a curve in which each point is 4 1/4" from the corner. (Use a tape measure that is pinned at the corner and move the tape in from top edge to side edge - it works like a giant protractor). THIS is your waist seam.
Add the skirt length (28") to the radius (4 1/4") = 32 1/4". Using the tape measure (still pinned at the corner), and mark a line (curved) 32 1/4" from the corner point, from the top edge of the paper to the side. THIS will be your hemline.
Because you've used a SQUARE piece of paper, you have only 1/4 of the circle drawn.
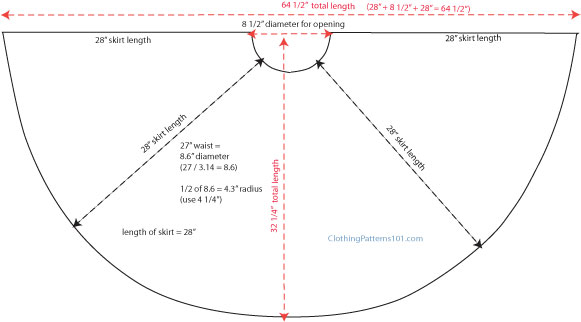
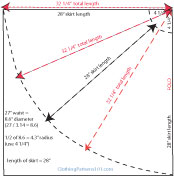
You can cut this as is (with seam allowances and hem added) and use 4 seams, or as drawn, with one side on the fold (see the sketch below for the half-circle you'll get if cut on the fold). You'll need WIDE fabric for this skirt if you use the fold.
Stitching the circle skirt can present its own challenges. This FREE video will give you some tips - including how to stitch a narrow hem on a curved edge!
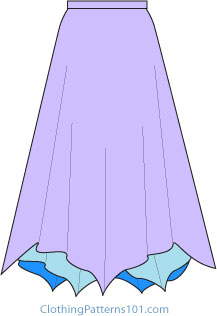
The Handkerchief Hem Variation
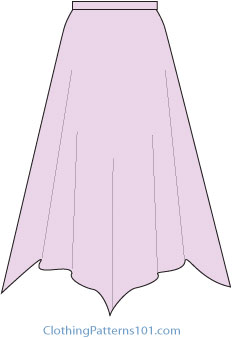
This is a very feminine version, as it is most attractive in a soft, sheer fabric, or lace.
It's especially lovely when made with multiple, sometimes contrasting, layers. Offset the points so you have lots and lots of interest and movement at the hem!
OK, if you made it though drafting the circle skirt, the handkerchief hem variation is a piece of cake!
The calculations for the waist and the length are the same as the circle skirt.
However, do NOT draw a curve for the hemline!
Just keep your pattern square (in this case, 32 1/4", the length of the side seams).
The corners of the square become an uneven hem, which is quite nice in a soft, fluid fabric.
For both the circle skirt and the handkerchief, be sure to finish with seam allowances, hem, and a waistband.
See, now that wasn't so bad, was it??
More Skirts and Dresses
Return to Clothing Patterns 101 Home Page
ClothingPatterns101.com does not sell the personal information of its users to anyone, ever.
